جدول المحتويات الديناميكي على Webflow CMS - أسهل طريقة
جدول المحتويات الديناميكي على Webflow CMS - أسهل طريقة
نشرت: 2022-03-22
لقد جعلنا من الممكن مؤخرًا إضافة حالات نشطة إلى جدول محتويات ثابت - راجع نهاية المقالة للحصول على الإرشادات!
خلفية
في Flowrite ، بدأنا مؤخرًا في كتابة أجزاء محتوى أطول وأردنا جعل مدوناتنا أكثر قابلية للقراءة ، بدءًا من العنصر الأساسي - جدول المحتويات.
نحن نستخدم Webflow ونحبه تمامًا ، ولكن اتضح أن إنشاء ToC بشكل قابل للتطوير لعناصر CMS لم يكن بهذه السهولة. تعتمد جميع الحلول الحالية على إما معرفات الإعداد والروابط يدويًا أو باستخدام مكونات إضافية تابعة لجهات خارجية.
أردنا نظامًا بسيطًا يقوم تلقائيًا بإنشاء ToCs بناءً على العناوين في مدوناتنا. هذا ما بنيناه ، وإليك كيف يمكنك أن تفعل الشيء نفسه!
كيف تعمل؟
صمم عناصر ToC الخاصة بك. اجعلها بالطريقة التي تريدها - أنشئ حالات تحوم ورسوم متحركة وما إلى ذلك.
قم بإنشاء div لـ ToC بمعرف محدد في أي مكان على صفحة CMS الخاصة بك.
أدخل جزءًا من التعليمات البرمجية في نهاية علامة <body> في صفحة نظام إدارة المحتوى لديك.
يتم إنشاء ToCs تلقائيًا لكل عنصر CMS.
إنشاء جدول المحتويات الديناميكي الخاص بك
صمم عناصر ToC الخاصة بك
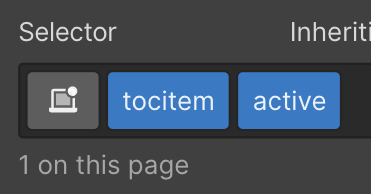
امنح عنصر ToC الخاص بك فئة (نستخدم "tocitem") وقم بتصميمه بالطريقة التي تريدها.
توصيتي هي استخدام صفحة خاصة منفصلة لتصميم هذه العناصر. بهذه الطريقة يمكنك بسهولة تعديل التصميم لاحقًا إذا لزم الأمر.
لقد أحببنا بساطة عناصر جدول محتويات الفكرة ، لذلك استخدمناها كمعيار.
إذا كنت تريد تضمين أكثر من نوع واحد فقط من العناوين ، فتأكد من منحهم فئة إضافية ("toc-h2" ، "toc-h3" ، إلخ.)
قم بإنشاء عنصر ToC الخاص بك
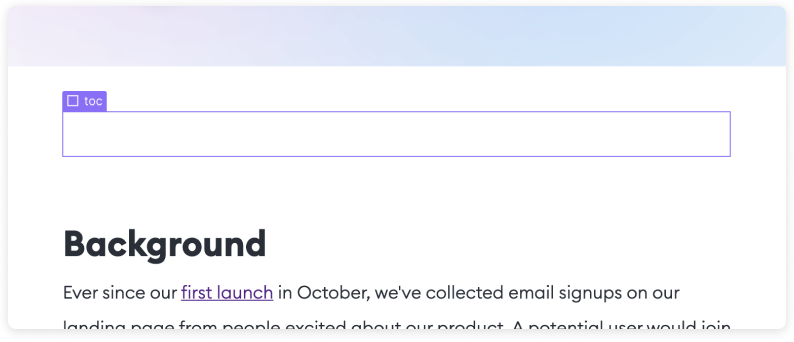
أضف div أينما تريد أن تكون ToC الخاصة بك وامنحه معرفًا "toc". مرة أخرى ، يمكنك تصميم هذا العنصر بالطريقة التي تريدها.
️
إذا كنت تريد أن يكون لديك ToC داخل عنصر النص المنسق الخاص بك ، فراجع نهاية هذه المقالة لمزيد من التفاصيل.
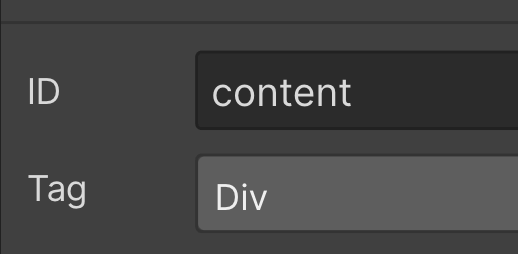
أخيرًا ، امنح عنصر Rich Text معرفًا "content". ستكون هناك حاجة إلى هذا لاحقًا للتأكد من أننا نستخدم العناوين الصحيحة في ToC.
اختر من بين خيارين
نظرًا لأنه سيتم إنشاء ToCs تلقائيًا ، نحتاج إلى الإشارة إلى العناوين التي نريد تضمينها فيها. في هذا المنشور ، نغطي خيارين:
إنشاء ToCs بناءً على نوع عنوان ثابت واحد فقط ، على سبيل المثال H2s.
إنشاء ToCs بناءً على عناوين متعددة من اختيارك - على سبيل المثال ، H2s و H3s لمدونة واحدة و H2s و H4s لمدونة أخرى.
الخيار 1: تعليمات الاستخدام أحادية العنوان
في هذا الخيار ، سيتم دائمًا إنشاء ToCs بناءً على نفس العنوان.
أدخل الشفرة التالية في نهاية علامة <body> في صفحات المجموعة الخاصة بك. انظر إلى التعليقات في نهاية كل سطر إذا كنت تريد أن تفهم كيف يعمل.
<script> document.getElementById("content").querySelectorAll("h2").forEach(function(heading, i) { // runs a function for all h2 elements inside your rich text element heading.setAttribute("id", "toc-" + i); // gives each h2 a unique id let str = heading.innerHTML; // adds section titles to slugs str = str.replace(/\s+/g, '-').replace(/[°&\/\\#,+()$~%.'":;*?<>{}]/g, "").toLowerCase(); // replaces spaces with hyphens, removes special characters and extra spaces from the headings, and applies lowercase in slugs heading.setAttribute("id", str); // gives each heading a unique id const item = document.createElement("a"); // creates an anchor element called "item" for each h2 item.innerHTML = heading.innerHTML // gives each item the text of the corresponding heading item.setAttribute("class", "tocitem"); // gives each item the correct class item.setAttribute("href", "#" + str); // gives each item the correct anchor link document.querySelector("#toc").appendChild(item); // places each item inside the Table of Contents div }); </script><script> document.getElementById("content").querySelectorAll("h2").forEach(function(heading, i) { // runs a function for all h2 elements inside your rich text element heading.setAttribute("id", "toc-" + i); // gives each h2 a unique id let str = heading.innerHTML; // adds section titles to slugs str = str.replace(/\s+/g, '-').replace(/[°&\/\\#,+()$~%.'":;*?<>{}]/g, "").toLowerCase(); // replaces spaces with hyphens, removes special characters and extra spaces from the headings, and applies lowercase in slugs heading.setAttribute("id", str); // gives each heading a unique id const item = document.createElement("a"); // creates an anchor element called "item" for each h2 item.innerHTML = heading.innerHTML // gives each item the text of the corresponding heading item.setAttribute("class", "tocitem"); // gives each item the correct class item.setAttribute("href", "#" + str); // gives each item the correct anchor link document.querySelector("#toc").appendChild(item); // places each item inside the Table of Contents div }); </script>
انشر الموقع وأنت على ما يرام
الخيار 2: الرموز المميزة متعددة العناوين
يمنحك هذا الخيار فرصة لتحديد كل حالة على حدة أي العناوين سيتم استخدامها لإنشاء ToCs.
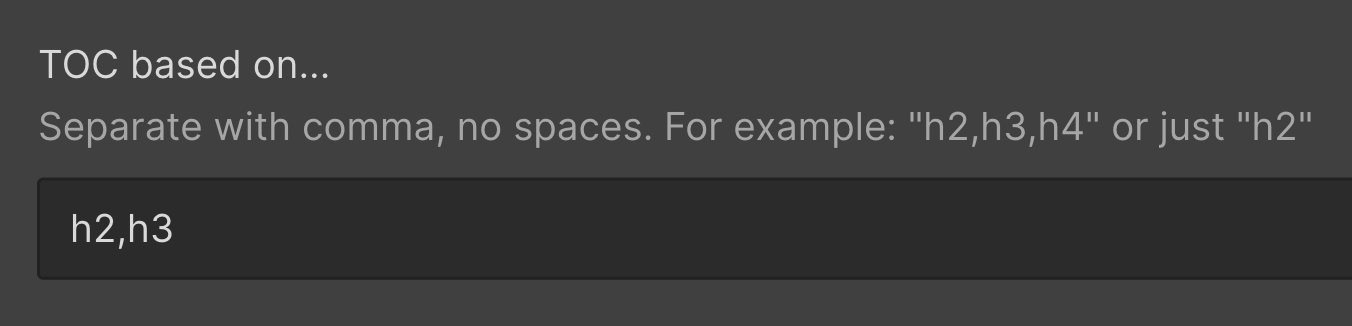
لنبدأ بإنشاء حقل نص جديد في مجموعتك. نسميها "جدول المحتويات على أساس ...". هذا هو المكان الذي تحدد فيه العناوين التي سيتم استخدامها في ToC لكل عنصر من عناصر CMS. افصل بفاصلة ولا تضع أي مسافات.
الآن ، أدخل الشفرة التالية في نهاية علامة <body> في صفحات المجموعة الخاصة بك. انظر إلى التعليقات في نهاية كل سطر إذا كنت تريد أن تفهم كيف يعمل.
<script> document.getElementById("content").querySelectorAll("[HEADINGS]").forEach(function(heading, i) { // runs a function for all headings inside your rich text element let str = heading.innerHTML; // adds section titles to slugs str = str.replace(/\s+/g, '-').replace(/[°&\/\\#,+()$~%.'":;*?<>{}]/g, "").toLowerCase(); // replaces spaces with hyphens, removes special characters and extra spaces from the headings, and applies lowercase in slugs heading.setAttribute("id", str); // gives each heading a unique id const item = document.createElement("a"); // creates an anchor element called "item" for each heading item.innerHTML = heading.innerHTML; // gives each item the text of the corresponding heading ("[HEADINGS]").split(",").forEach(function(x) { // runs a function for each item in your headings list if (heading.tagName.toLowerCase()==x) { item.classList.add("tocitem", "toc-" + x); // gives each item the correct class } }); item.setAttribute("href", "#" + str); // gives each item the correct anchor link document.querySelector("#toc").appendChild(item); // places each item inside the Table of Contents div }); </script><script> document.getElementById("content").querySelectorAll("[HEADINGS]").forEach(function(heading, i) { // runs a function for all headings inside your rich text element let str = heading.innerHTML; // adds section titles to slugs str = str.replace(/\s+/g, '-').replace(/[°&\/\\#,+()$~%.'":;*?<>{}]/g, "").toLowerCase(); // replaces spaces with hyphens, removes special characters and extra spaces from the headings, and applies lowercase in slugs heading.setAttribute("id", str); // gives each heading a unique id const item = document.createElement("a"); // creates an anchor element called "item" for each heading item.innerHTML = heading.innerHTML; // gives each item the text of the corresponding heading ("[HEADINGS]").split(",").forEach(function(x) { // runs a function for each item in your headings list if (heading.tagName.toLowerCase()==x) { item.classList.add("tocitem", "toc-" + x); // gives each item the correct class } }); item.setAttribute("href", "#" + str); // gives each item the correct anchor link document.querySelector("#toc").appendChild(item); // places each item inside the Table of Contents div }); </script>
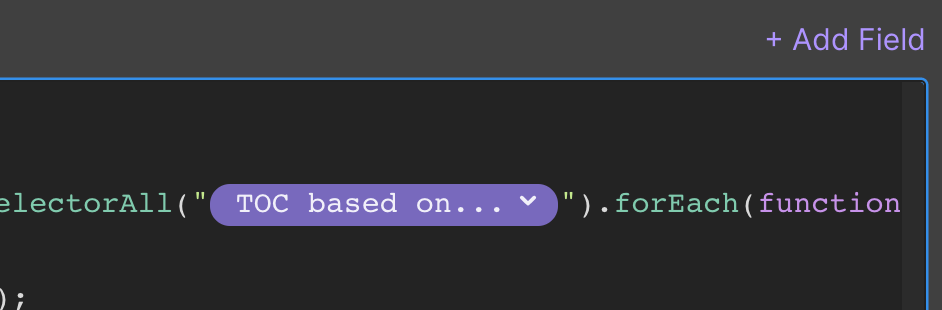
أخيرًا ، تأكد من استبدال [HEADINGS] بقيمة حقل CMS "ToC بناءً على ...".
هذا كل شيء ، أنت جاهز للنشر.
التخصيص
الحالات النشطة في جدول محتويات ثابت
مستوحاة من منشور Chris Coyier على CSS-Tricks ، قمنا ببناء طريقة لإضافة حالات نشطة إلى عناصر ToC المرئية - وهي ميزة رائعة لتوصيفات ToC اللاصقة.
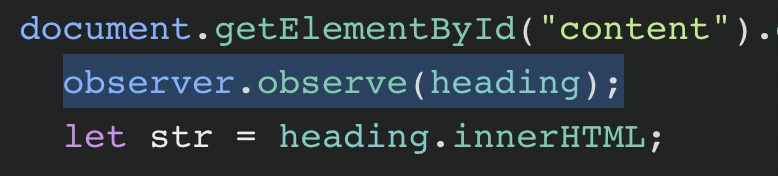
أولاً ، تضاف "Observer.observe (العنوان) ؛" في بداية الكود الذي قمت بتطبيقه مسبقًا. انظر لقطة الشاشة للموقع الصحيح.
بعد ذلك ، أضف مقتطف الشفرة التالي أعلى جميع التعليمات البرمجية الموجودة في ToC:
تضيف الشفرة فئة تسمى "نشطة" إلى العنصر المرئي وتزيل الفئة عند ظهور موضوع جديد.
أخيرًا ، تأكد من تصميم الفئة "النشطة" من خلال إعطائها لون خلفية مختلفًا ، على سبيل المثال.
عرض ToCs على بعض عناصر CMS فقط
إذا كنت لا تريد ظهور ToC في بعض عناصر CMS ، فأكمل الخطوات التالية:
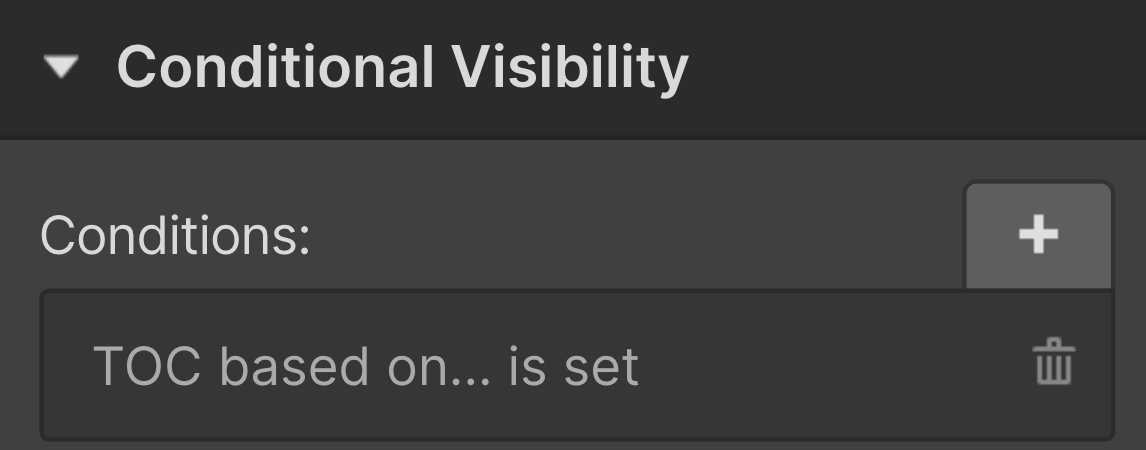
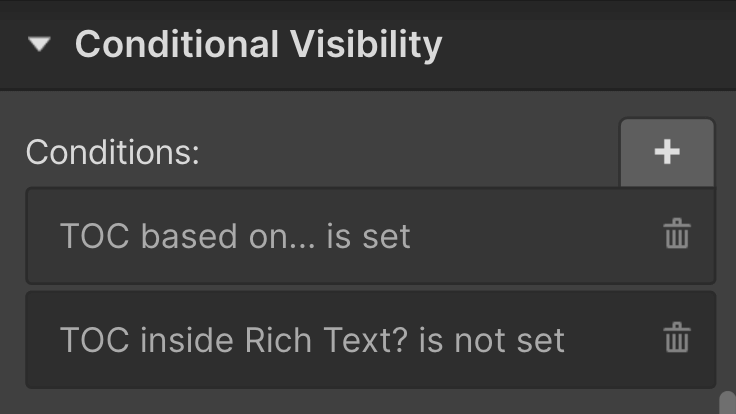
1. اترك الحقل "ToC بناءً على .." فارغًا. إذا كنت تستخدم الخيار 1 ، فأضف مفتاح تحويل في مجموعة CMS الخاصة بك للإشارة إلى ما إذا كان يجب أن تظهر ToC أم لا.
2. اجعل رؤية ToC div الخاصة بك مشروطة بناءً على المحدد في الخطوة 1.
3. قم بإنشاء عبارة if في بداية مقتطف رمز ToC لتجنب تشغيل الوظيفة إذا كان الحقل فارغًا. تذكر أن تختم بـ "}".
ToC داخل عنصر Rich Text
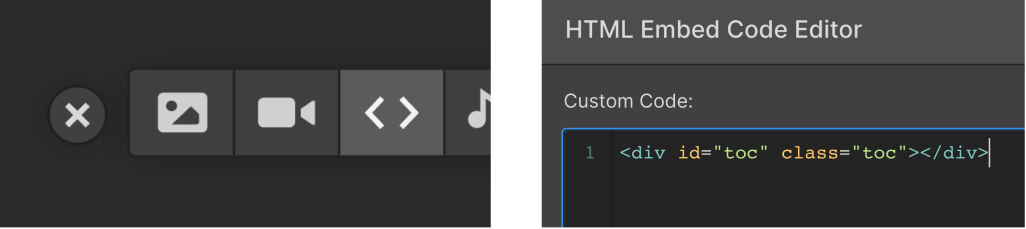
إذا كنت تريد وضع ToC الخاص بك داخل عنصر Rich Text ، فيمكنك نسخ عنصر ToC div مع كود التضمين.
قم بإنشاء عنصر رمز مخصص داخل النص المنسق الخاص بك وقم بنسخ ولصق "<div id =" toc "class =" toc "> </div>" في حقل الرمز.
إذا كنت تريد أن يكون لديك ToC مضمّن على بعض عناصر CMS فقط و ToC "عادي" على عناصر أخرى ، فأنت بحاجة إلى القيام ببعض الحيل الإضافية:
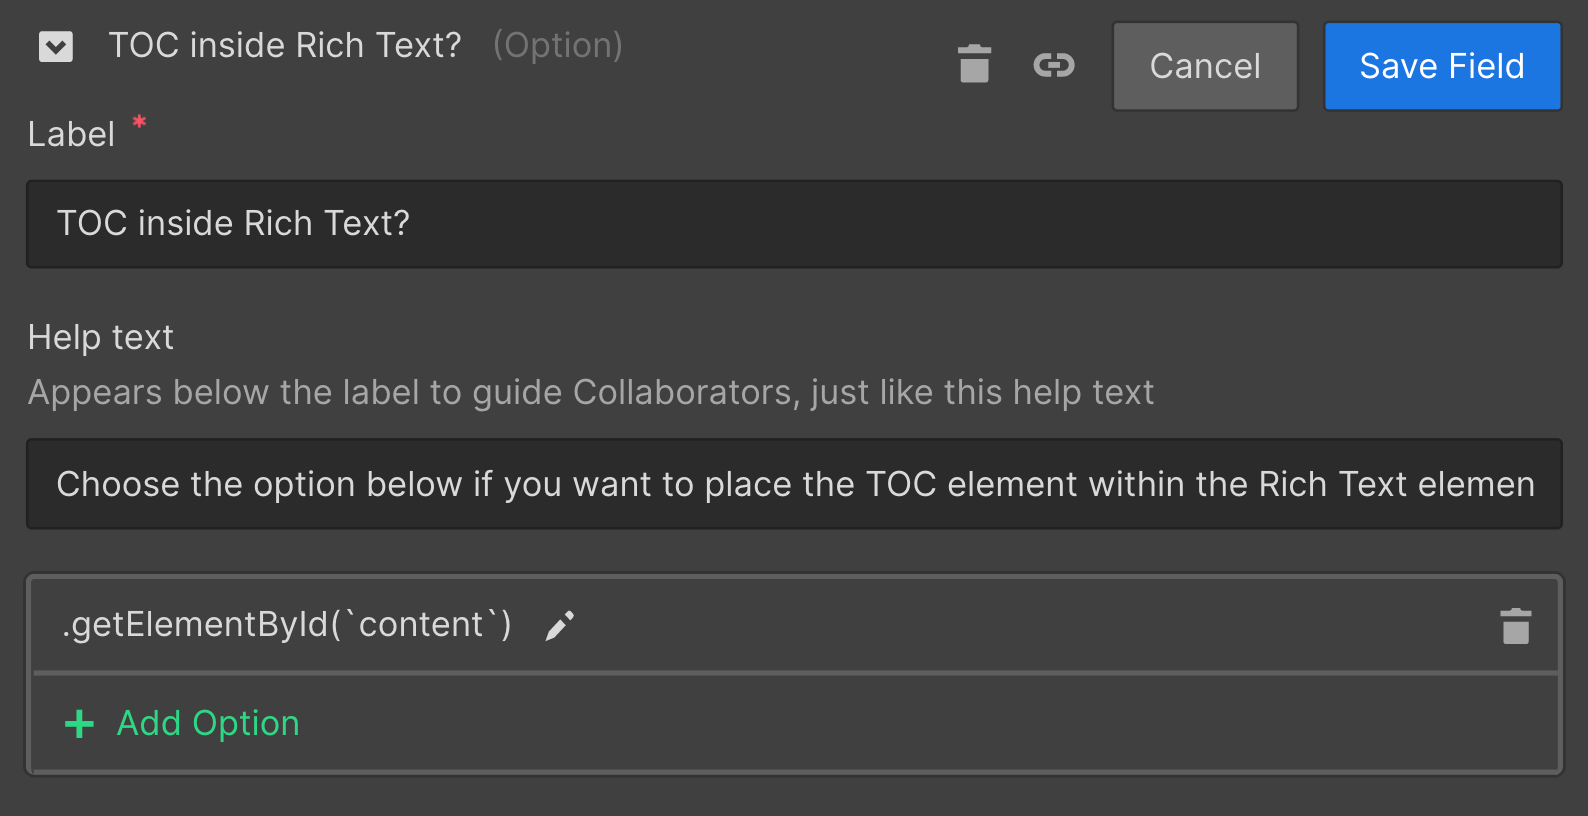
1. قم بإنشاء محدد خيار بخيار واحد فقط: ".getElementById ('content'). حدده على عناصر CMS حيث تريد أن يكون لديك ToC داخل Rich Text.
2. قم بعرض ToC "العادي" فقط إذا لم يتم تعيين المحدد.
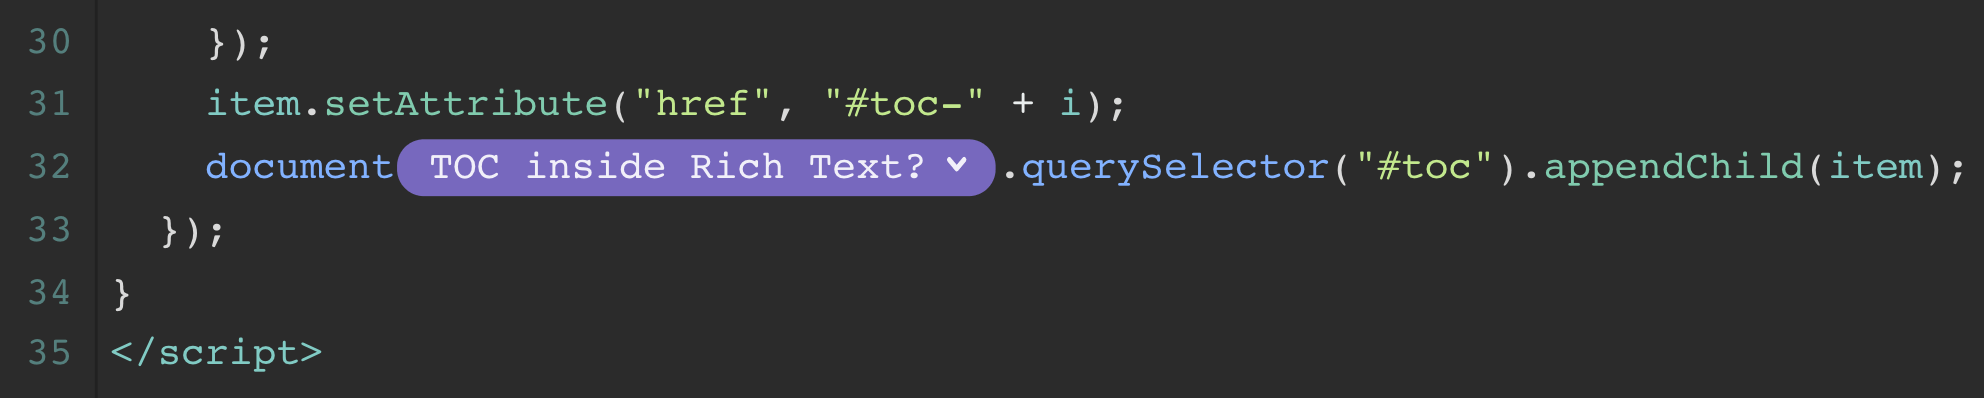
3. أضف قيمة المحدد إلى الجزء التالي من الكود. الآن ، إذا تم تحديد المحدد ، فسيقوم الرمز بإلحاق عناصر ToC داخل قسم ToC الصحيح.
تجنب تراكب شريط التنقل عند التمرير
قد تلاحظ أنه عند النقر فوق ارتباط ToC ، يتم تمرير الصفحة لأسفل إلى العنوان الصحيح ولكن يتم حظرها بواسطة شريط التنقل.
لإصلاح هذا:
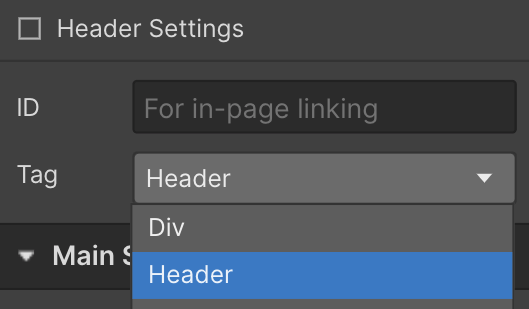
تأكد من تعيين موضع عنصر التنقل على "ثابت"
تغيير علامة عنصر التنقل إلى "رأس"
هذا هو! في حالة مواجهة أي مشاكل على طول الطريق ، لا تتردد في إرسال بريد إلكتروني إلي أو التواصل عبر Twitter / LinkedIn.
أود أيضًا معرفة ما إذا كنت انتهيت من استخدام هذا النظام ، لذا يرجى الاتصال بي إذا فعلت ذلك وشارك المنشور مع شخص آخر قد يستفيد منه ️