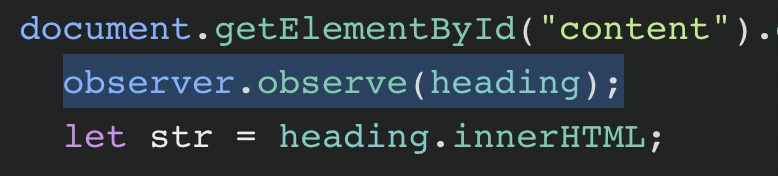
<script> document.getElementById("content").querySelectorAll("h2").forEach(function(heading, i) { // runs a function for all h2 elements inside your rich text element heading.setAttribute("id", "toc-" + i); // gives each h2 a unique id let str = heading.innerHTML; // adds section titles to slugs str = str.replace(/\s+/g, '-').replace(/[°&\/\\#,+()$~%.'":;*?<>{}]/g, "").toLowerCase(); // replaces spaces with hyphens, removes special characters and extra spaces from the headings, and applies lowercase in slugs heading.setAttribute("id", str); // gives each heading a unique id const item = document.createElement("a"); // creates an anchor element called "item" for each h2 item.innerHTML = heading.innerHTML // gives each item the text of the corresponding heading item.setAttribute("class", "tocitem"); // gives each item the correct class item.setAttribute("href", "#" + str); // gives each item the correct anchor link document.querySelector("#toc").appendChild(item); // places each item inside the Table of Contents div }); </script><script> document.getElementById("content").querySelectorAll("h2").forEach(function(heading, i) { // runs a function for all h2 elements inside your rich text element heading.setAttribute("id", "toc-" + i); // gives each h2 a unique id let str = heading.innerHTML; // adds section titles to slugs str = str.replace(/\s+/g, '-').replace(/[°&\/\\#,+()$~%.'":;*?<>{}]/g, "").toLowerCase(); // replaces spaces with hyphens, removes special characters and extra spaces from the headings, and applies lowercase in slugs heading.setAttribute("id", str); // gives each heading a unique id const item = document.createElement("a"); // creates an anchor element called "item" for each h2 item.innerHTML = heading.innerHTML // gives each item the text of the corresponding heading item.setAttribute("class", "tocitem"); // gives each item the correct class item.setAttribute("href", "#" + str); // gives each item the correct anchor link document.querySelector("#toc").appendChild(item); // places each item inside the Table of Contents div }); </script>
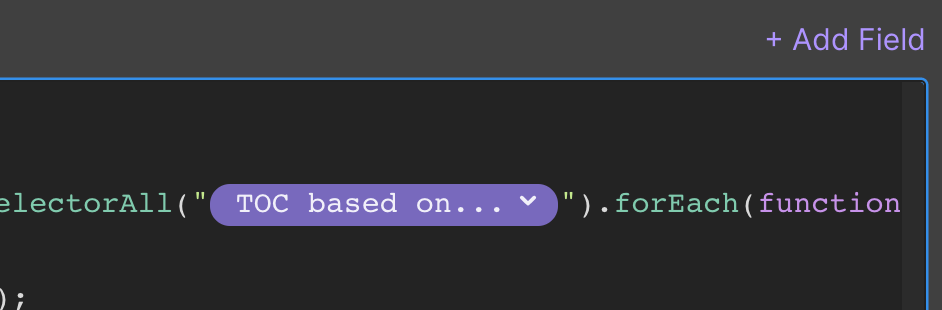
<script> document.getElementById("content").querySelectorAll("[HEADINGS]").forEach(function(heading, i) { // runs a function for all headings inside your rich text element let str = heading.innerHTML; // adds section titles to slugs str = str.replace(/\s+/g, '-').replace(/[°&\/\\#,+()$~%.'":;*?<>{}]/g, "").toLowerCase(); // replaces spaces with hyphens, removes special characters and extra spaces from the headings, and applies lowercase in slugs heading.setAttribute("id", str); // gives each heading a unique id const item = document.createElement("a"); // creates an anchor element called "item" for each heading item.innerHTML = heading.innerHTML; // gives each item the text of the corresponding heading ("[HEADINGS]").split(",").forEach(function(x) { // runs a function for each item in your headings list if (heading.tagName.toLowerCase()==x) { item.classList.add("tocitem", "toc-" + x); // gives each item the correct class } }); item.setAttribute("href", "#" + str); // gives each item the correct anchor link document.querySelector("#toc").appendChild(item); // places each item inside the Table of Contents div }); </script><script> document.getElementById("content").querySelectorAll("[HEADINGS]").forEach(function(heading, i) { // runs a function for all headings inside your rich text element let str = heading.innerHTML; // adds section titles to slugs str = str.replace(/\s+/g, '-').replace(/[°&\/\\#,+()$~%.'":;*?<>{}]/g, "").toLowerCase(); // replaces spaces with hyphens, removes special characters and extra spaces from the headings, and applies lowercase in slugs heading.setAttribute("id", str); // gives each heading a unique id const item = document.createElement("a"); // creates an anchor element called "item" for each heading item.innerHTML = heading.innerHTML; // gives each item the text of the corresponding heading ("[HEADINGS]").split(",").forEach(function(x) { // runs a function for each item in your headings list if (heading.tagName.toLowerCase()==x) { item.classList.add("tocitem", "toc-" + x); // gives each item the correct class } }); item.setAttribute("href", "#" + str); // gives each item the correct anchor link document.querySelector("#toc").appendChild(item); // places each item inside the Table of Contents div }); </script>
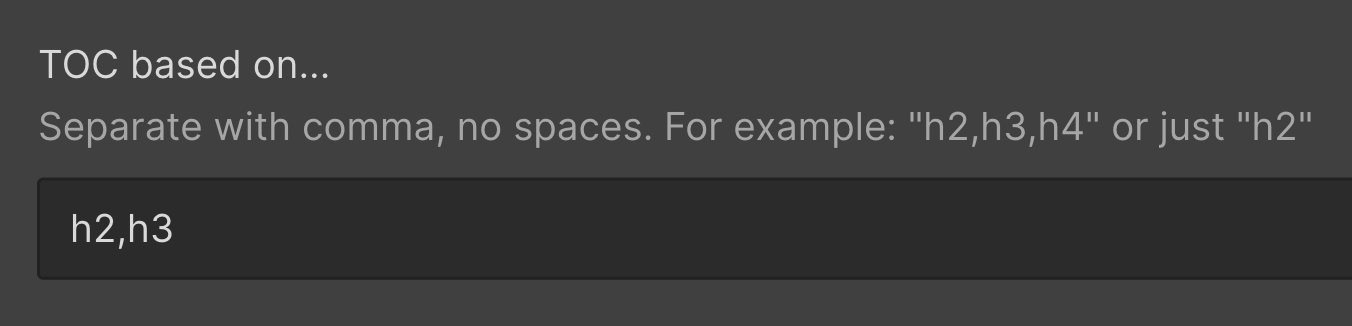
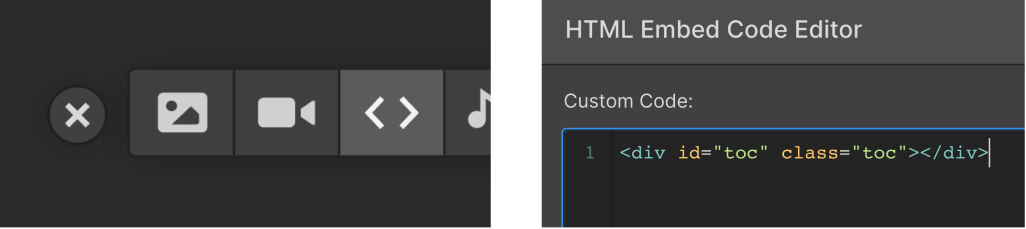
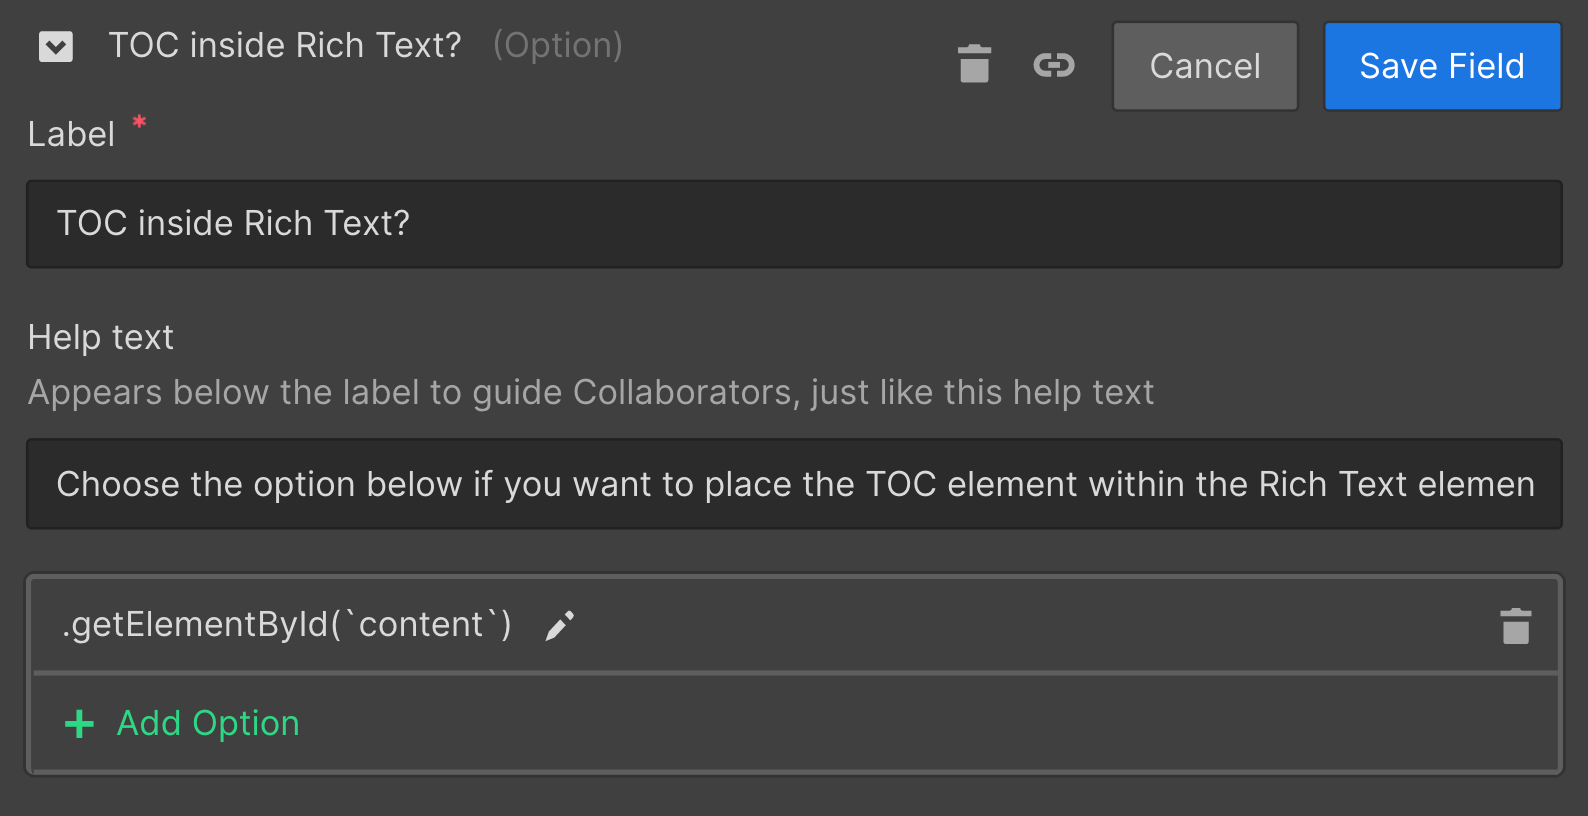
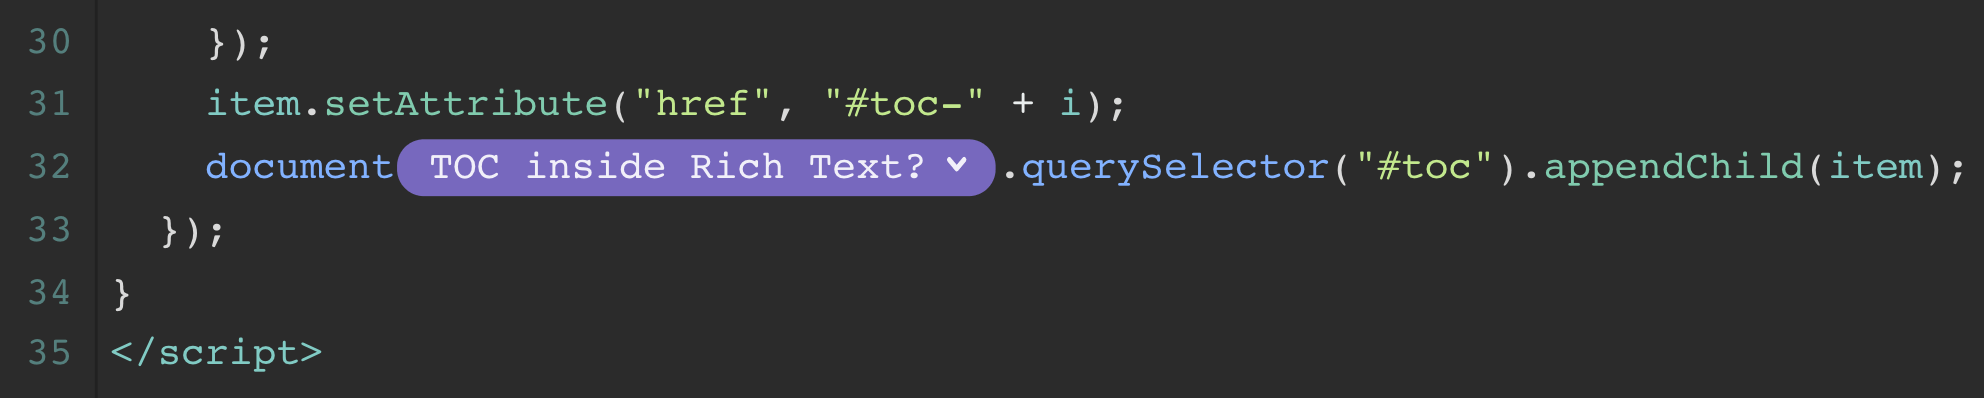
最後,確保將 [HEADINGS] 替換為“ToC based on...”CMS 字段的值。
就是這樣,您已準備好發布。
定制
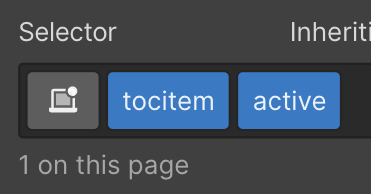
粘性目錄中的活動狀態
受 Chris Coyier 在 CSS-Tricks 上的帖子的啟發,我們構建了一種將活動狀態添加到可見 ToC 項目的方法——這是粘性 ToC 的一個很好的功能。